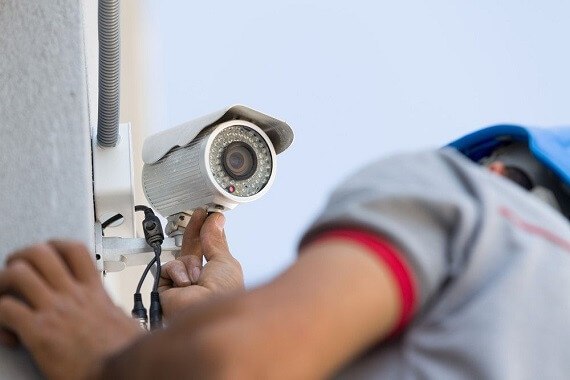
Outdoor security cameras are now a key part of home security setups and provide additional protection against possible break-ins.
This guide will assist you in installing and maintaining your outdoor security cameras, guaranteeing a comprehensive security system that includes security camera installation calgary.
Choosing the Right Outdoor Security Cameras
When it comes to outdoor security, choosing the right type of camera is crucial. Here are some of the more common types:
Bullet Cameras: These are long and cylindrical, offering a classic security camera appearance. They are excellent for deterring intruders and are usually mounted on walls or ceilings. Bullet cameras often have high-quality lenses and may include features like infrared night vision and weatherproof casings.
Dome Cameras: Named for their dome-shaped housing, these cameras are often used for their discreet appearance. The accommodation makes it hard for onlookers to see where the camera points, providing a psychological deterrent. Dome cameras are ideal for use in areas where aesthetics are concerned, such as entrances or gardens.
Wireless Cameras: These cameras connect to your home network wirelessly, offering flexibility in placement and ease of installation. They are ideal for locations where running cables is impractical. However, they require a robust wireless signal and regular battery changes or charging.
PTZ (Pan, Tilt, Zoom) Cameras: PTZ cameras offer the ability to pan (move horizontally), tilt (move vertically), and zoom in on specific areas. They are ideal for covering large areas and can be remotely controlled to focus on different scenes.
Infrared/Night Vision Cameras: These cameras have infrared LEDs to provide clear images in low light conditions or complete darkness. They are essential for round-the-clock surveillance.
Network/IP Cameras: These cameras connect to your home network, allowing you to access live footage from anywhere via the internet. They usually offer higher-resolution video and more advanced features than analog cameras.
Thermal Cameras: Although more expensive, thermal cameras detect heat signatures and are excellent for detecting intruders in complete darkness or through obstacles like smoke or foliage.
Motion-Activated Cameras: These cameras start recording only when motion is detected, saving storage space and allowing you to focus on events of interest. They are helpful in areas with low foot traffic.
Varifocal Cameras: These lenses adjust the focal length, offering more flexibility in framing the desired field of view than fixed-lens cameras.
Selecting the correct type of camera depends on your specific needs:
- For general surveillance, bullet or dome cameras are often sufficient.
- For large properties or areas requiring detailed monitoring, PTZ or high-resolution network cameras are preferable.
- In areas with poor lighting, infrared or night vision cameras are essential.
- Smaller, more discreet cameras like dome cameras may be ideal for covert surveillance.
Step-by-Step Installation Guide for Outdoor Security Cameras
When installing outdoor security cameras, the first step involves planning and preparation. Identify the critical areas around your property that require surveillance, such as front and back doors, garages, and walkways.
- If you’re using wireless cameras, check the Wi-Fi strength in these areas to ensure a reliable connection. You’ll also need to gather essential tools and materials for the installation, which typically include a drill, screws, wall plugs, a ladder, and possibly cable clips or conduits for wired cameras.
- The next stage is camera positioning. It is recommended to mount the cameras at least 9 feet above the ground to prevent tampering. However, they should still provide a clear view of the area you want to monitor. Adjust the camera angle to cover the desired area, but avoid pointing cameras directly at sources of light or into neighboring properties, respecting privacy and ensuring clear visibility.
- Mounting the cameras is a crucial step. Hold the camera’s mounting bracket against the wall, level it, and mark the drill points. Drill holes at these points, insert wall plugs and then screw the mounting bracket into place. After this, attach the camera to the frame, secure it properly, and adjust the angle for the best view.
- It would help to run the cables from each camera to your DVR or NVR for wired cameras. Secure and protect the lines using cable clips or conduits, particularly for outdoor runs. Connect the wires to the camera and the DVR/NVR, ensuring connections are secure and watertight.
- Setting up wireless cameras involves powering them on by installing batteries or connecting them to a power source. Then, follow the manufacturer’s instructions to connect the camera to your Wi-Fi network and sync it with your monitoring system.
Once everything is set up, it’s essential to test the setup. Check that each camera’s feed appears on your DVR/NVR or monitoring app. Make any necessary adjustments to the camera angles to ensure they cover the desired areas.
Securing and protecting the cameras is the next step. Ensure all cameras are firmly attached, and their cables are adequately secured and protected from the elements. Consider additional protective measures like weatherproof enclosures for cameras that aren’t fully weatherproof.
The final check and configuration include testing the night vision feature of the cameras in low-light conditions to ensure clarity. If your cameras have motion detection, configure these settings according to your needs. Also, check for and install any firmware updates to ensure your cameras operate efficiently with the latest features and security patches.
Conclusion
The setup and observation of outdoor security cameras are simple yet vital tasks that substantially boost your home’s security. By following the instructions provided, you can create a robust and effective surveillance system that provides peace of mind with the added expertise of Spotter Security Company.
